New World ERP Orchestrator
The New World ERP Orchestrator is a master project that will enable you to configure each of your ERP software installs on one screen. It will allow you to install/upgrade all of ERP (eSuite/ERP/DSS, etc) at one time and ensure versioning stays the same for all products. Regardless of the ordering of products on the screen, it will ensure the products install in the proper order for you.
Note: For customers who used the multi-instance eSuite deployment to host multiple sets of eSuite websites on one web server, an additional step is recommended. Please follow the Pre-Existing Multi-Instance Install Support instructions.
- Login to Tyler Deploy with your Tyler Community credentials.
-
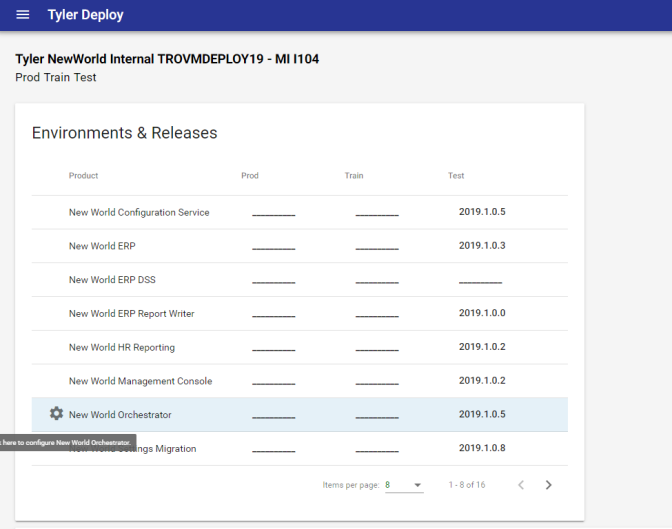
On the Tyler Deploy homepage, hover over New World Orchestrator and click the gear icon to the left.
-
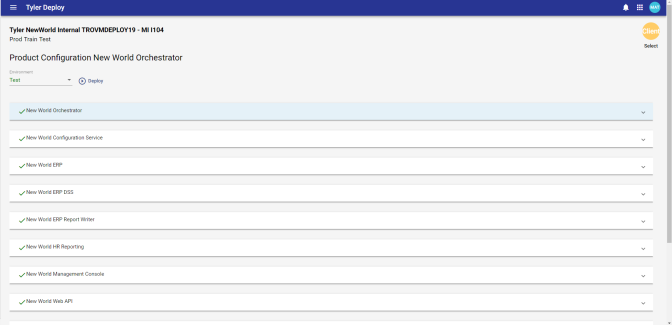
Pick the environment you are configuring (Prod, Test, Train, Impl, etc.). Note that the software you license will show up here that needs to be configured. This screen will be widely variable by customer site. Several of these settings will autofill from the New World Settings Migration project. Configure the necessary values that do not populate from the Settings Migration project. Rows with green check marks
 are fully configured and rows with yellow yield signs
  are missing configuration values. The below example consists of a fully configured New World ERP Orchestrator environment.
Note: The banners that you see within the New World Orchestrator are determined by the software you license. You will likely see less than the screenshot below. Also, a setting exists under the New World Orchestrator banner itself to allow you to skip installing DSS. This may be desirable in a test environment, for instance.
Note: If you have questions about what to put into the fields of any of the projects, see the ERP DECISION TREE document, which can help with this.
Note: If you have built a new application server that has not previously had New World ERP installed and license New World ERP Report Writer, you will need to run the New World Management Console deployment and apply your license key prior to running the New World Ochestrator deployment. The Report Writer deployment requires a valid license key to be applied for the deployment to be successful.
Note: If you do not run Decision Support (DSS) in this environment, deselect the Install DSS check box under the New World Orchestrator banner. Information will still need to be entered in the DSS section, but it can be dummy information if the Install DSS check box is disabled.
-
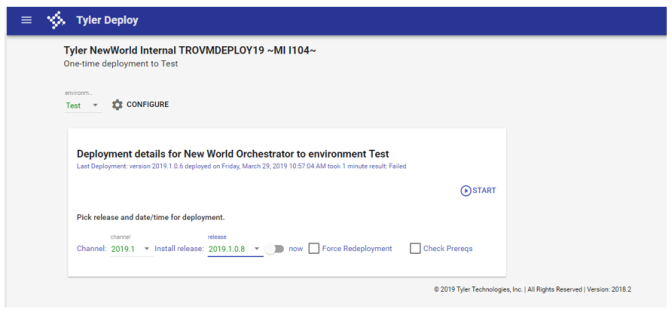
Click the Deploy button to move to deployment page quickly. Pick a release from the Release field and click START.
-
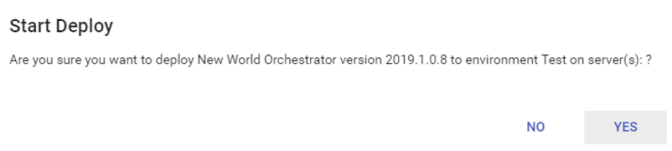
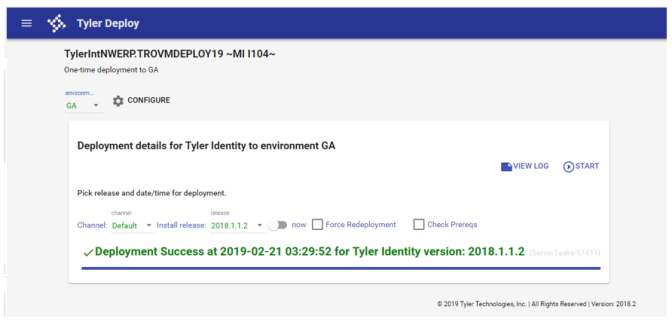
Confirm the information in the Start Deploy pop-up is correct and continue onward. A general example of what this dialog looks like is below.
-
Once the deployment is complete, the administrator will see a success or failure message in Tyler Deploy. Failures are accompanied by a log file.
We recommend a reboot of the Application Server after deploying the Orchestrator project for the first time. This will allow services to start back up on a reboot. If this is your first time using Tyler Deploy on this Application Server, the New World ERP Management Console needs to be configured.
-
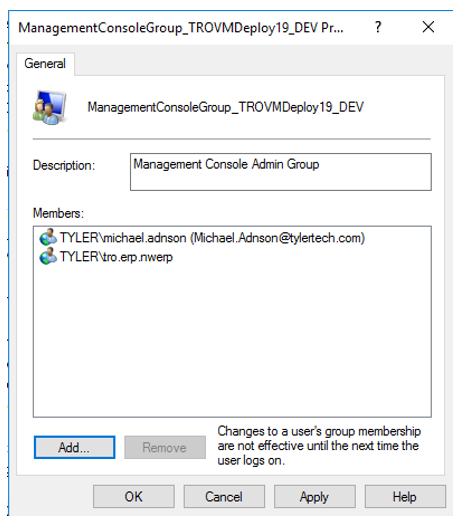
The first step to configure the Management Console (now a website) is to add the server admin users or groups to the ManagementConsoleGroup_INSTANCENAME group in Server Manager > Computer Management. In the below example, these two users would be able to access the new Management Console website from anywhere within the network.
-
At this point of the deployment, the Management Console should be reachable at: https://APPSERVERHOSTHEADERMAPPING/ManagementConsole#/Base. Users will be presented with an authentication challenge at this step to ensure they are part of the proper groups.
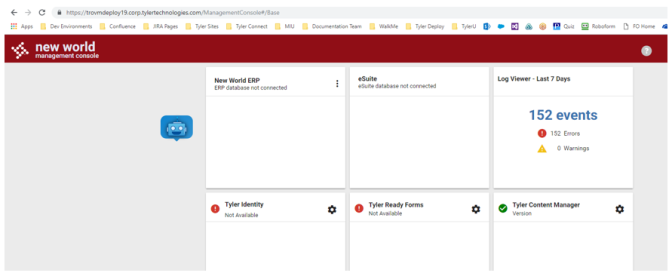
After configuring the Management Console, you should be able to access New World ERP at https://APPSERVERHOSTHEADER/nwerp. Please note that even though the suffix of the URL changed from /logos to /nwerp, an IIS redirect has been programmed into the install to account for user’s existing bookmarks. This change should be seamless for end users.
At this point, eSuite should also be accessible. This is a good time to check eSuite access.